Categories
application Design Development Projects website

Degree Chooser

Areas of Study screenshot

We made a pretty slick degree chooser at work. Ours is labeled as Areas of Study, but ultimately we made an easier way for our visitors to sift through what degree(s) might appeal to them.

Live example:

https://stockton.edu/academic-affairs/academic-schools-programs.html

There’s a lot going on under the hood with this one, and we’ve utilized what I think are some pretty cool techniques to make it not only easy to use but also easy for our content managers to keep up to date.

Our CMS (content management system) is OU Campus which specializes in higher ed. They’re great for us. Their templating system relies on XML/XSLT (not always so great), so ultimately a content manager typically is editing an XML file on the staging server that is then transformed into an HTML file that live on the production server for visitors to see.

So to make editing as seamless as possible, we setup a table is OU Campus that our content manager can edit, just like any regular page. Just what they’re comfortable doing day in and day out. We then leverage some XSLT magic (there are parts of it that I still believe to be magic even though I wrote it) to transform the content managers edits. Here’s what’s happening when they edit:

  1. Content manager makes normal edits to a html table with columns, rows, etc. Each degree is a new row in the table.
  2. On publish the XSLT transforms the edited XML into 2 files. A standard HTML page of the table transform and grouped by degree type.
    1. This is the most basic but functional version of the page. It’s served up like this to meet any visitors who may be visiting with the most ancient of browsers. They will still at minimum get a fully functioning list of linked degrees.
    2. The table is also transformed via another XSLT file to a JSON file. This JSON file will serve as our data source of areas of study. The external JSON file makes it easier to use the data in other pages/applications too!
  3. So now we have 2 files. The HTML page which is fully functional, yet a tad boring and a JSON file just waiting to be used.

Next we used Vue to write the JavaScript for this little app. I found Vue to be pretty lightweight and translates well to our CMS and the talents of our team. It’s my current favorite way to code up JS projects.

We didn’t use the vue-cli, just some vanilla Vue for this one. If we do a 2.0 we’ll probably go with vue-cli as we have a much better understanding of it now and it’s benefits.

Vue

4. The Vue script not only filters by title, school, etc. but we also include a field for tags. This really opens the door for us to make sure that our degrees can be found not only on their proper name, but perhaps a name that is used at other institutions, or even if searched as a career driven term. This should be a big upgrade for all.

5. To top it off we collect Events in Google Analytics of terms searched on. This data will help us make sure that the tags being used make sense and if we should consider adding new tags or even renaming or launching new degrees in the future.

All in all a very fun project that really helps to modernize a highly used page on our site. We’re looking to incorporate the JSON data into other apps/uses as well.

Here’s the repository on GitHub:

https://github.com/joedag32/areas-of-study-app

Categories
Design Development

Vue JS 2 – The Complete Guide (incl. Vue Router & Vuex)

Vue.js logo

I’ve been eager to get better with Vue.js, and in additional to reading and watching all the great resources online, I also give the Vue JS 2 – The Complete Guide (incl. Vue Router & Vuex) on Udemy a shot.

The course was really great. I had to put it down for extended periods then come back due to my heavy workload at work, but the instructor Maximilian really put together a very solid Vue.js course. Highly recommended

The final project was a stock trading app. The final stock trading app did a good job of utilizing Vuex and Vue Router too, so that was a plus for sure.

Here’s some of the issues or differences I had on the final project:

  • The only part I really had a little difficulty on was the Javascript logic for creating the stock and adding it to the portfolio. Ultimately I did get it to work, but I was going with 1 stock component for all the uses, while the course example went with 2 separate stock components. While either could work, going with 2 components in this case did seem to be a bit easier to get going.
  • Sometimes I still go with ES5 style instead of going with the ES6 Higher Order functions. I forget .forEach, .map, etc. but am getting better of giving them a short as well as the good old for loop that I tend to lean on.
  • I went with Bootstrap 4 instead of 3 that was used in the tutorial
  • For now I’ve omitted the Firebase integration. I’ll probably go back and include that at some point, but was thinking of implementing it in a slightly different way that was was proposed in the lesson.
  • Had to change the publicPath in config for the project to work on GitHub Pages. This had me stumped for a few minutes, but made sense once I thought it through.

The source can be found on GitHub. It can also try it out on the GitHub Page Environment.

Great course and highly recommended if you understand Javascript and want to figure out how the Vue.js works.

Categories
Development

Instagram Feed using Javascript and XSLT/XML

Recently an Instagram widget that we were using on a site broke when the Instagram API was upgraded/deprecated (I guess it depends on which side you are on). The widget was no longer supported, so we were looking for some workarounds/solutions.

We investigated moving to another commercial widget, building a script using their API and whatever other options we could think of. We found InstagramFeed on GitHub, which is a really cool Javascript.

The CMS we work in uses XML/XSLT for it’s templating, so using the CMS’s built in Components, we built a simple Component that would give a content manager access to basic form controls so to create/edit the script. We then wrote some XSLT to build out the script call and output to generate the InstagramFeed script on our website. Nothing too amazing, but not too shabby for the very short turnaround.

Here’s the XSLT we used to output the script with the options of passing:

  • feed name or type, @ username or # tag
  • number of items to display
  • number of items for row
<xsl:template match="div[@id='instagram-feed-comp']">
  <xsl:param name="feed-type">
    <xsl:choose>
      <xsl:when test="starts-with(@data-feed, '@')">username</xsl:when>
      <xsl:otherwise>tag</xsl:otherwise>
    </xsl:choose>
  </xsl:param>
  <xsl:param name="feed-name" select="substring(@data-feed, 2)"/>
  <xsl:param name="items" select="@data-items"/>	
  <xsl:param name="items-per-row" select="@data-items-per-row"/>	
			
  <div id="instagram-feed-comp"></div>
  <script src="_host-path_/instagram-feed-min.js"></script>
  <script>
  (function(){
    new InstagramFeed({
      '<xsl:value-of select="$feed-type"/>': '<xsl:value-of select="$feed-name"/>',
      'container': document.getElementById("instagram-feed-comp"),
      'display_profile': false,
      'display_biography': false,
      'display_gallery': true,
      'callback': null,
      'styling': true,
      'items': <xsl:value-of select="$items"/>,
      'items_per_row': <xsl:value-of select="$items-per-row"/>,
      'margin': 1,
      'lazy_load': true
    });
  })();
  </script>
</xsl:template> 

We hate XSLT, but you can do some very cool stuff with it if you can find good documentation and examples out there.

Once we make our template match, we’re assigning data attributes we have setup in our Component (not shared here) as XSLT params for later output. We create a new param feed-type that checks whether the feed-name starts with an @ or # to determine if it’s an Instagram account or a hashtag to display.

Next we just output a div for the script to append to, the include script for the Instagram Feed, and the function with options we want for our display. The scripts creators really did a great job documenting the options. GitHub and the web in general are so awesome at times!

We output XSL value-of’s where we want our Component values to output in the script. Again, very simple but works great without our CMS. A content manager can very easily add and update their Instagram feed on their respective page without knowing and Javascript or having access to source code.

Categories
Development website

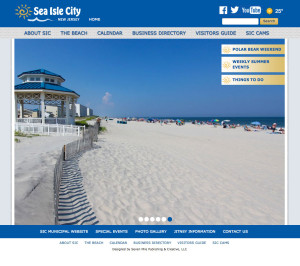
Sea Isle City Website and Mobile Apps

Sea Isle CityJust wrapping up some work for Sea Isle City on a new website and some mobile apps as well. The website is www.visitsicnj.com and the mobile apps are available for iOS and Android.

This was a rather large project, and working with the folks at 7 Mile Times was a pleasure yet again. They are extremely organized and great to work worth.

Kim provided an excellent design to build upon and Patty was fantastic is organizing content and keeping things rolling along. It was pretty great.

We built the site on a very stable CMS that made it very easy for the admins to manage the site. Training them literally took minutes if that, given the simplicity of the CMS.

The calendar presented some interesting issues. They wanted the events grouped into months, and working with dates/events can always be a challenge. After much trial an error a solution was found, and it didn’t require much overhead at all to execute.

This is not the first website I have worked on with these folks, so we’ve got a bit of a formula down and it really showed.

A mobile app for both the iOS and Android platforms was to be developed as well. Given the nature of the apps, we decided to build on the PhoneGap/Cordova platform and them create builds for each respective platform from that.

Mobile development is still a bit of an adventure for me, but this one did go a lot smoother than my last. Just having more hours under my mobile app development belt as well as improved libraries/info on hand really helped out.

We are pulling info from the website view web services we created, and the mobile app is consuming those JSON feeds to populate the app. It really is pretty amazing  one everything is setup and producing and consuming the web services. Pretty amazing, slick, and efficient.

While we of course hit some bumps and hurdles along the way, I’m glad to say we did meet our deadline and on budget! Not bad for such a large and complex project!

Still have some minor loose ends to wrap up, but all in all this was a very exciting and rewarding project to work on! I’ve learned much and we’ve put out a very solid product(s). The clients are extremely happy and have been the utmost pleasure to work with.

Categories
Development

Cordova statusbar for iOS Plugin

Since iOS 7 was released a month or so ago I’ve been completely stumped with fixing my Cordova iOS app that relied on jQueryMobile. I couldn’t find a clean solution to fix the now changed handling of the statusbar in iOS 7. I had come up with some CSS hacks to work around, but was having a hard time getting my fixed headers to cooperate with jQueryMobile.

I finally noticed that a statusbar plugin had been released for Cordova (PhoneGap). I immediately went to the command line and added it to my project!

I did have a little bit of a time figuring out how to make my statusbar behave like an iOS 6 app. It turned out to be much simpler than I was expecting and of course I was over thinking it.

I just had to edit the config.xml file. In my case I set the preference tag “StatusBarOverlaysWebView” true and a custom color for the statusbar in the preference tag “StatusBarBackgroundColor” as well. Then the plugin worked it’s magic!


Categories
Development

jQuery Mobile Hi-Res Images

I’ve been developing a little mobile app using jQuery Mobile and PhoneGap and ran into a little difficulty with supporting both Retina and earlier iPhone displays. Turns out it’s not too difficult using some CSS3 media queries.

However my hi-res images were showing up way too big still.

Simply adding the background-size attribute to what a “standard size” image should be did the job. It did make a lot of sense too, even though I hadn’t thought of it at first.

For instance, my 640px x 1136px image needed a background-size attribute of 320px x 480px to display properly on the Retina display since they pack a much higher pixel density.

1
2
3
4
5
6
@media only screen and (-webkit-min-device-pixel-ratio:2) {
    .ui-body-a, .ui-overlay-a {
        background: url('img/home_bg_2x.jpg') center bottom no-repeat;
        background-size: 320px 480px;
    }
}